This page takes you through the process of building an ultrasound sensor car for obstacle avoidance and a mecanum wheels car with a remote.
To view other kinds of robot cars and to look at our reviews of off the shelf cars click here
Before starting this project, it is strongly recommended that you learn the following skills:
MicroPython for microcontrollers. You should understand functions and variables
Basic wiring with a breadboard. You should be able to use the GPIO pins of a Raspberry Pi Pico to flash multiple LED lights and control motors with a L298N (the red motor driver board)
Some double sided foam tape
Required Materials
You will need the following to build your car.
A chassis. You can buy a metal robot car chassis, like the one we used (see the pictures below), or you can buy a plastic one, similar to the upper deck we use. Alternatively you can use whatever materials you have at hand, such as a block of polystyrene or LEGO bricks
A microcontroller. The one that we use is the Raspberry Pi Pico WH, which is recommended for its inexpensive price and WiFi functionality. The Pico 2 WH should also retain the same functionality, although we have not tested it for this project. Ensure that you have a microcontroller with header pins to push it into the breadbord.
A breadboard. we use a half+ breadboard.
A toggle switch component that works for a breadboard.
At least 1 (preferably 2) L298N motor drivers. These are necessary for the Pico to interface with the motors properly. The ultrasound car we made uses only 1, so you will only 1 if you are following that design.
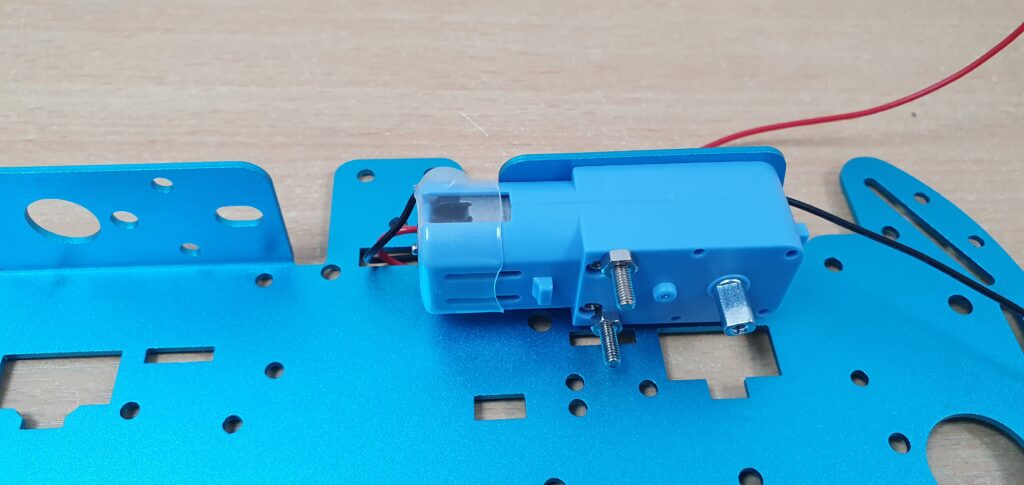
Some gearbox motors. Usually, you will find these either in yellow (these are plastic), or a more expensive metal geared variant. Ideally, you want motors with DuPont male header pins on the end, as you can see in the pictures.
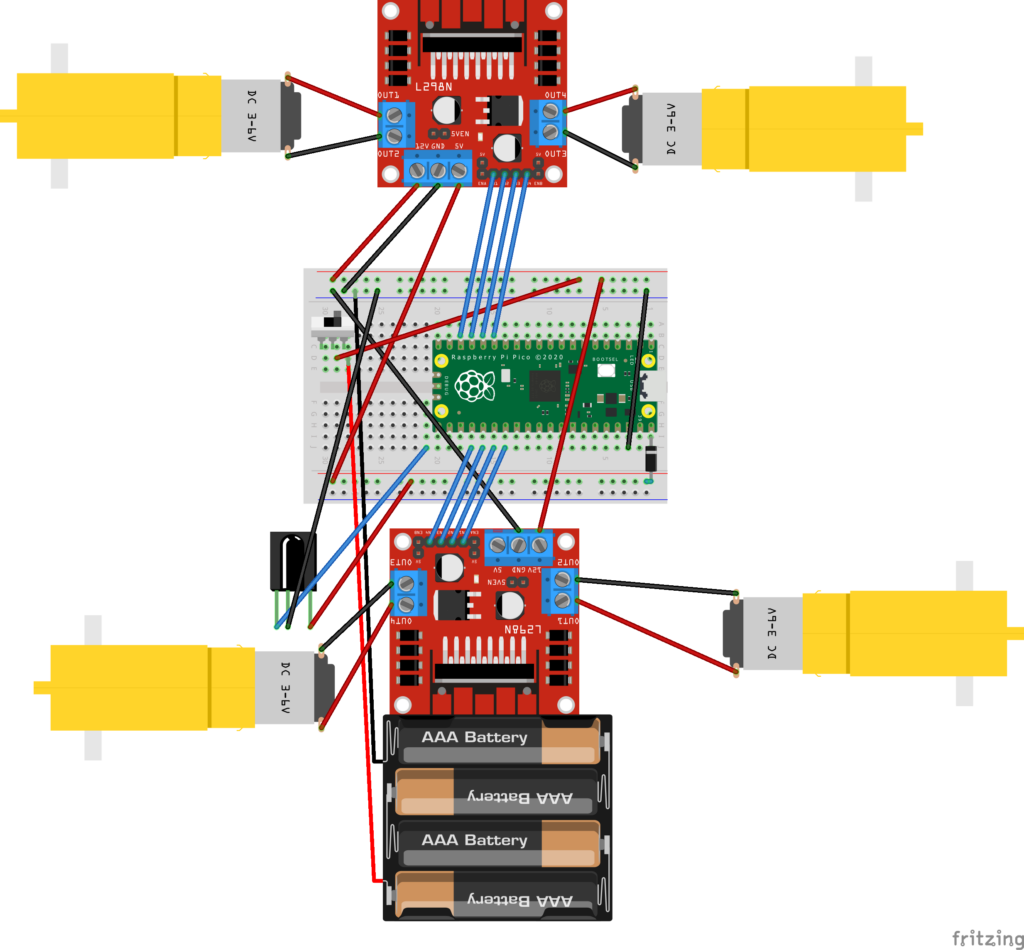
Some wheels to match the geared motors. Mecanum wheels are recommended because, when combined with 2 motor drivers, they allow omni-directional movement.
Some sort of battery pack. It is recommended to use a 3-pack 18650 battery pack, like we used. This will put out slightly more power than the L298N is rated for, but only for a short time, before it levels out. You will also need a special charger for these batteries. An alternative is to use 4 or more AA batteries, but this is not recommended due to the low voltage and fast drain.
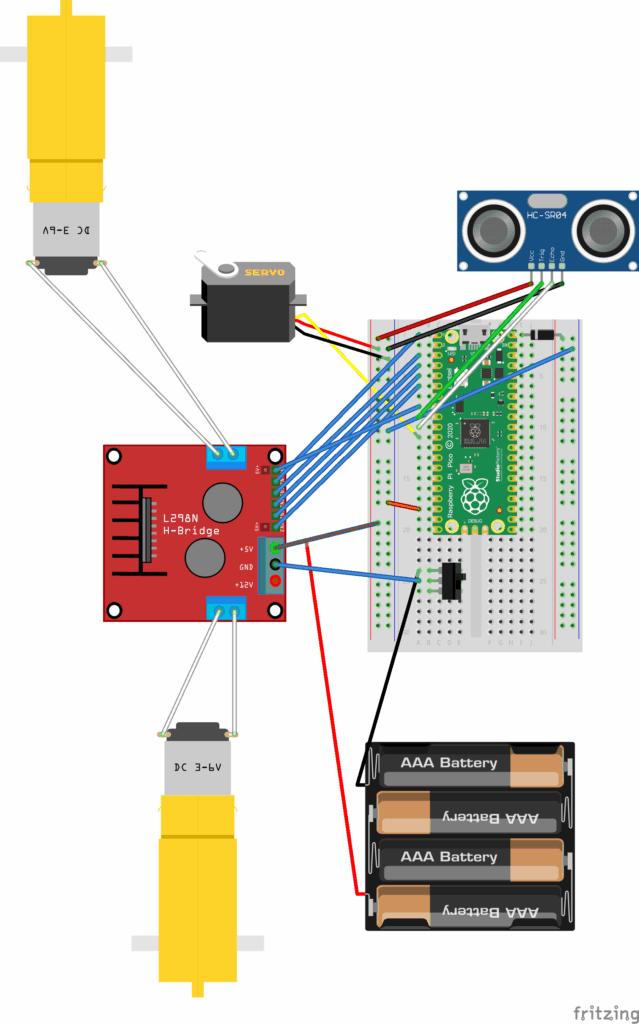
For the Ultrasound car: a servo (9G) and a HC-SR04 ultrasound sensor, as well as a mount for it.
For the Infrared car: a IR sensor and controller bundle.
Steps for Assembly
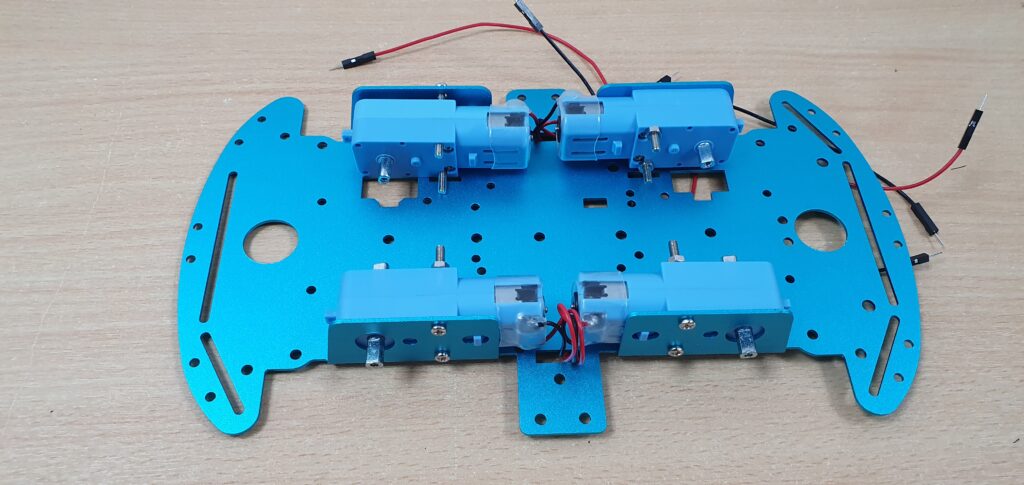
Begin assembling the car by attaching the motors to the chassis.
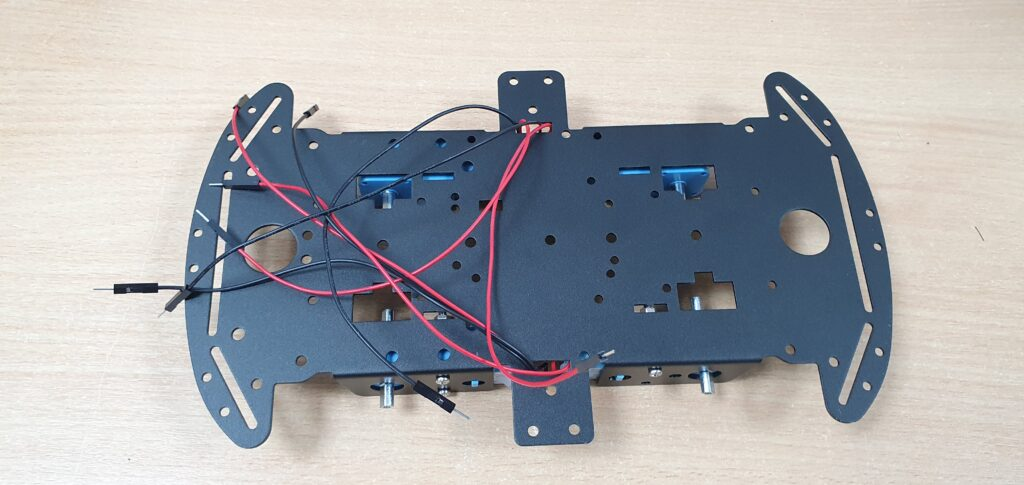
Repeat for all 4 motors, ensuring that you thread the wires through the holes in the chassis
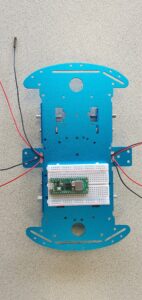
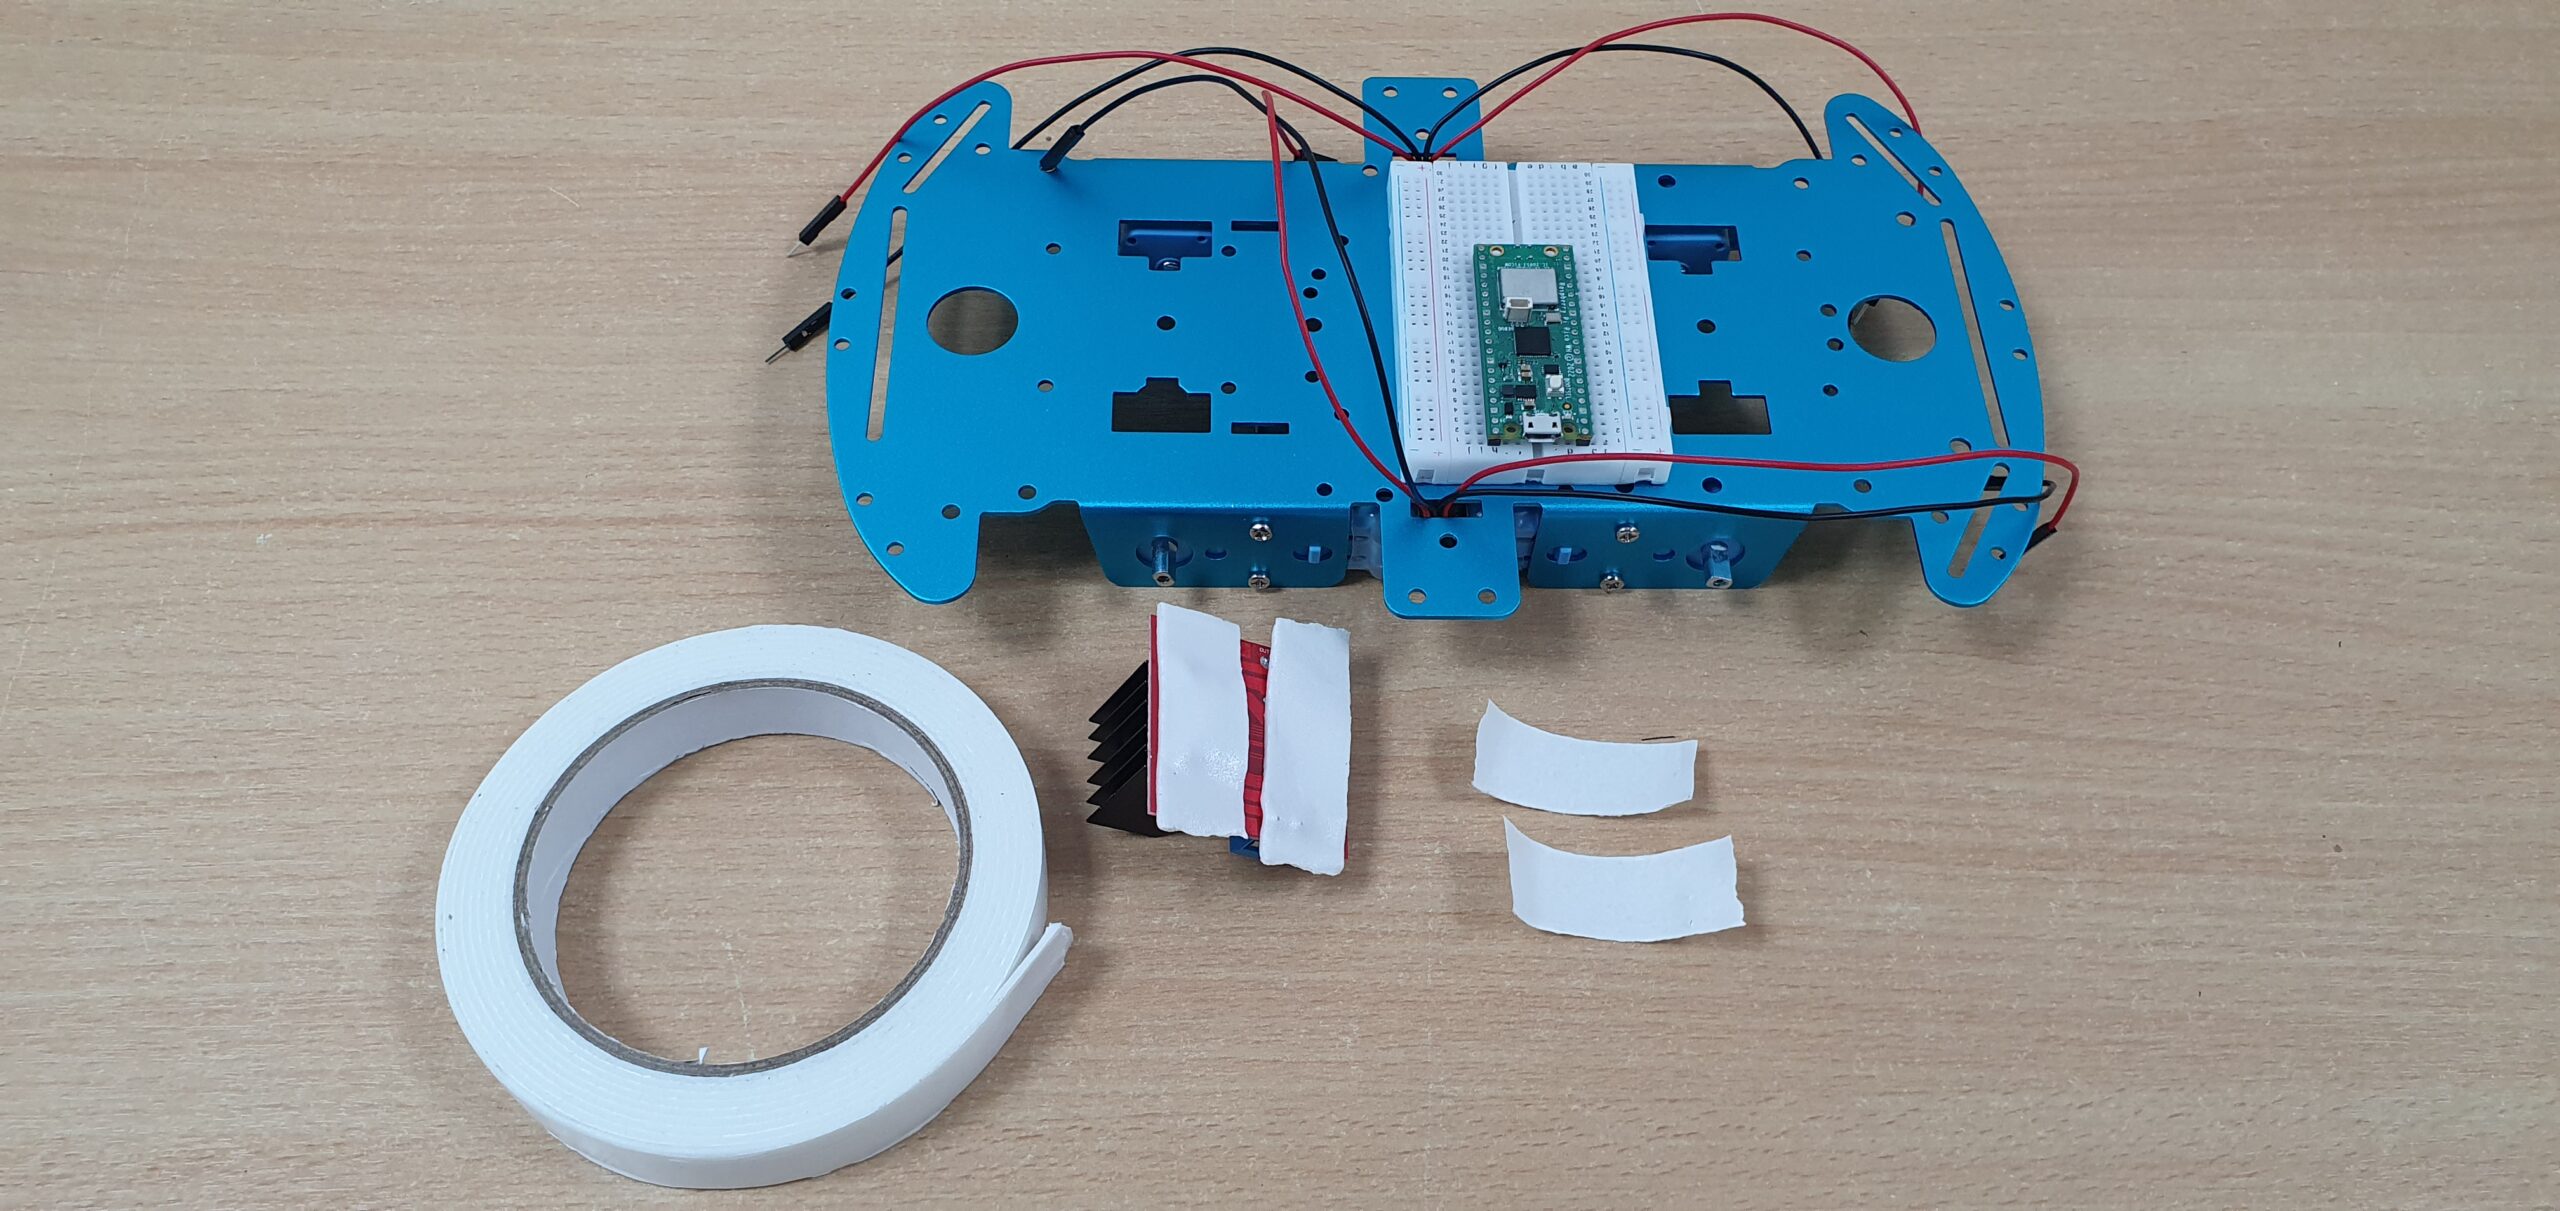
Stick the breadboard to the car. The breadboard should have a peelable sticky back, although it may be preferable to use double-sided tape in case you want to move it later. Also, push the pi pico into the breadboard, ensuring that it starts at the very top of the breadboard, and is centered.
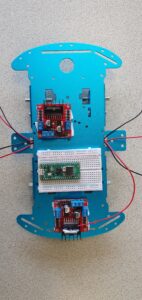
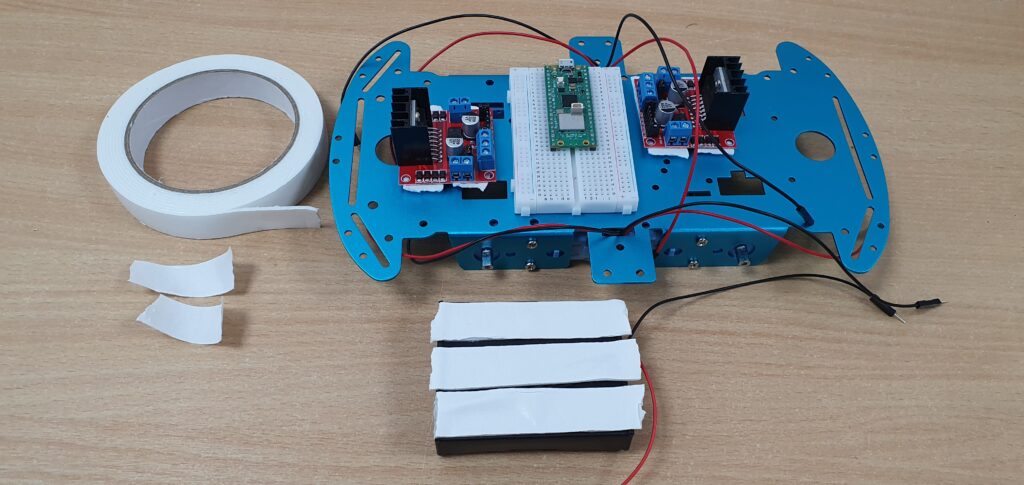
Stick foam tape to the back of the L298N to prevent it from scratching the chassis and potentially shorting out.
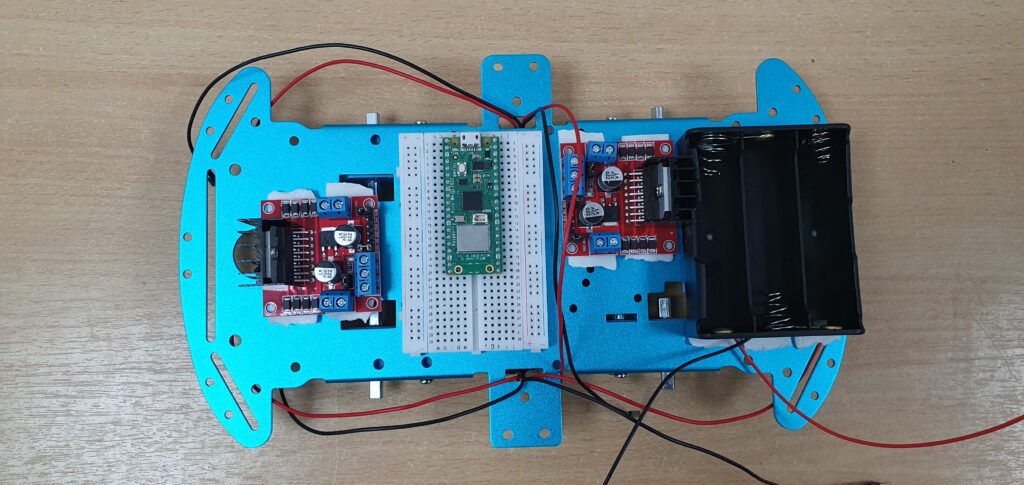
Then, attach it to the chassis, and repeat for the second driver.
Attach the battery pack in the same way.
To view more photos of how to assemble the chassis click here
This link also shows off the shelf cars that you could purchase and program.